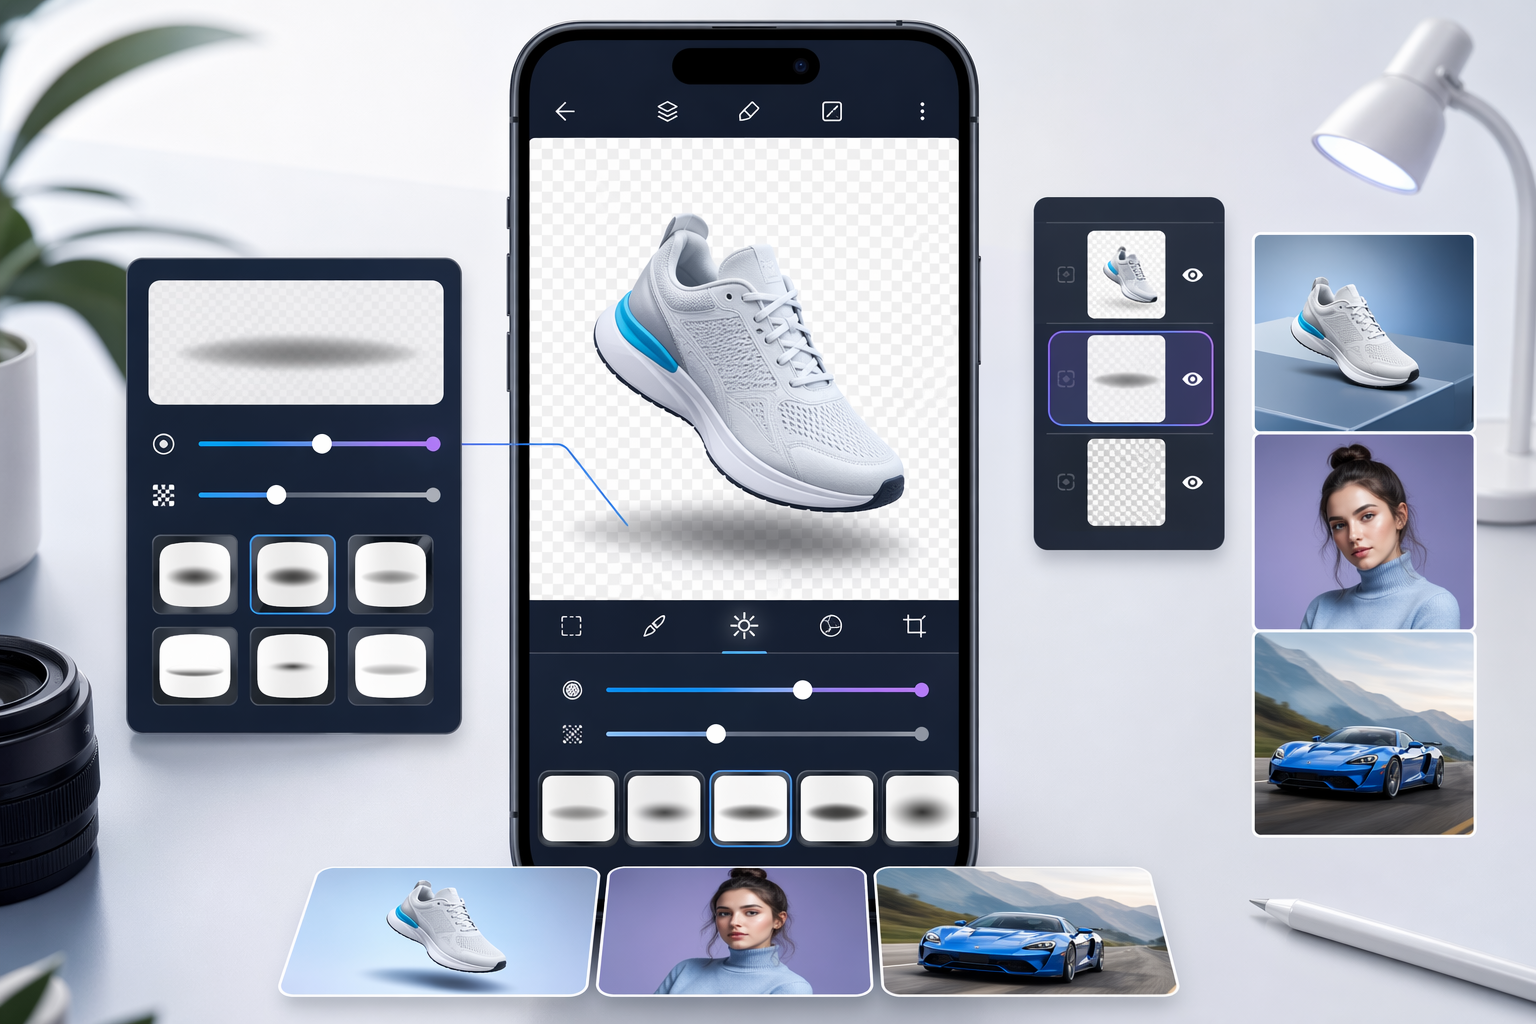
If you want to add shadow to image edits on your phone, the goal is usually not a dramatic special effect. Most people simply want a cleaned-up product, portrait, or cutout to feel grounded again. A realistic shadow treatment helps the subject sit naturally in the frame instead of looking like it was pasted on top.
That matters most after object removal, background cleanup, or background replacement. Once distractions are gone, the photo can sometimes look flatter than before. A subtle shadow, or careful preservation of the original one, restores depth without making the edit obvious.
This guide focuses on practical mobile workflows with TouchRetouch, the photo-editing app from ADVA Soft GmbH, based in Berlin, Germany. TouchRetouch is designed for cleanup and retouching on iOS and Android, so this article stays honest about what it can support well: removing distractions, refining edges, softening harsh areas with Blur, and finishing images after using Backgrounds.
What a photo shadow effect does in an image
Why shadows make products and subjects look more grounded
A photo shadow effect is simply a darker area that shows where light is blocked. In a photo, that darkness gives you visual clues about depth, light direction, distance from the background, and where the subject touches a surface. Even a soft contact shadow under a product can make the whole image feel more believable.
This is especially useful in marketplace listings, social posts, and portrait edits. A bottle on a white table, a person against a replaced backdrop, or a cleaned-up flat lay often looks better when there is still some visible depth under or behind the subject.
When a flat cutout starts to look unnatural
Many photos start to look odd after cleanup because the original scene had small grounding details that were removed along the way. Dust, cords, labels, floor marks, and clutter disappear, but so does some of the natural visual context. The result can be a subject that feels too crisp against a smooth background.
That is why people searching for shadow photo editing often are not looking for a fantasy effect. They usually want separation from the background, a more natural base under the subject, or a softer transition after retouching.
The difference between realistic depth and heavy stylized effects
Realistic depth is subtle. It follows the visible light in the original photo, stays close to the subject, and supports the scene without calling attention to itself. Heavy stylized effects do the opposite: they add dark, oversized, or mismatched shadows that can make a mobile edit look artificial.
TouchRetouch is best positioned for the realistic side of this work. It is a mobile photo editing app focused on cleanup and retouching, not a full desktop compositing suite. So instead of promising a one-tap synthetic shadow generator, this guide shows how to preserve usable shadows, remove unwanted ones with Erase AI, and refine transitions with Blur and cleanup tools.
That distinction matters because some readers actually need the reverse workflow first. If an existing shadow is distracting, too dark, or falling in the wrong place, TouchRetouch can help remove it before you refine the rest of the photo. In other words, good shadow work often starts with deciding what should stay and what should go.
Before you add depth: prepare the photo for a natural result
Remove distracting objects around the subject
Before any shadow-related finishing, clean the frame. Shadow work looks more believable when the area around the base of your subject is simple and tidy. If there are price tags, crumbs, cables, reflections, or random marks near the bottom edge, even a subtle depth treatment will look messy.
TouchRetouch gives you several ways to handle this. Remove Objects lets you brush over or circle distractions with the Lasso, while Restore helps bring back small areas if you remove too much. This is useful for tabletop products, portraits with stray background details, and ecommerce photos where the subject needs a cleaner presentation.
Clean up stray lines, meshes, and background clutter
Some distractions are harder to fix with a general selection. If your image includes wires, power lines, or similar linear elements, Line Removal is the better tool. If a fence or mesh is sitting in front of the scene, Mesh Removal is designed for that specific problem.
For more manual refinement, Clone Stamp helps copy nearby texture into a problem area. That is especially useful when the automatic cleanup leaves behind repeating patterns, uneven flooring, or edge artifacts near the subject. In shadow photo editing, those small repairs matter because the eye notices the ground plane first.
Decide whether to keep, soften, or remove existing shadows
At this stage, look closely at any shadow already in the image. If it matches the light direction and sits naturally under the subject, keep it. A real shadow is usually more convincing than trying to fake one later.
If the shadow is too harsh, too patchy, or broken by previous edits, plan to refine it rather than erase everything. If it actively hurts the composition, Erase AI can help remove distractions including unwanted shadows, signs, trash cans, and background people while keeping the main subject intact.
A practical workflow is to zoom in and clean the scene in passes. Start with obvious distractions like dust, labels, cords, floor marks, and small reflections. Then inspect the edges around the subject and the area directly beneath it, because that is where depth cues either survive or fall apart.
Automatic removal works best on simpler or more uniform backgrounds. If the floor has heavy texture, patterned tile, rough concrete, or mixed lighting, expect to spend more time refining with Clone Stamp. The cleaner that base area looks, the easier it is to preserve a believable sense of contact with the surface.
If your main goal is the opposite workflow and you need to remove or reduce a shadow first, see this guide on how to remove or refine a shadow in a photo. It pairs well with the finishing steps covered here.
Another common cleanup issue is glare, especially in portraits or lifestyle photos where reflections compete with subtle depth cues. If that is part of your image, this related guide can help you remove glasses glare from photo before you finish the rest of the edit.
How to add shadow to image with realistic mobile workflows
Workflow 1: refine an existing shadow instead of creating a fake one
The most realistic way to add shadow to image edits on mobile is often not to create a new shadow at all. It is to preserve the one already there and clean around it. If your product or subject was photographed on a real surface, that original contact shadow is your best starting point.
For example, imagine a skincare bottle on a white counter. The bottle already casts a soft gray shadow under its base, but there is also dust, a price sticker, and a distracting reflection nearby. Remove the distractions with Remove Objects, use Restore if the cleanup touches the shadow edge, and keep the natural dark area that anchors the bottle.
This works best when the original light direction is clear. If the shadow falls slightly behind and to one side of the subject, your cleanup should respect that direction. Avoid over-removing the darker area beneath the object, because that is often what keeps the photo from looking flat.
Workflow 2: use selective Blur to soften harsh edges
Sometimes the shadow is present but looks too sharp after editing. That can happen when the background has been cleaned aggressively or when the edge between subject and surface becomes too crisp. In that case, Blur can soften selected areas for a more natural transition.
Think of a mug on a tabletop after retouching away crumbs and scratches. The mug still has a shadow, but the edge looks unnaturally hard compared with the rest of the scene. Applying Blur selectively to the harshest part of that transition can make the contact area feel more realistic without darkening the image further.
This approach is subtle by design. You are not painting in a new shape. You are reducing the cutout look by softening edges that became too obvious during cleanup. Because Blur is a premium AI feature, it may require a subscription, and some AI-powered features require an internet connection.
Workflow 3: finish a background replacement so the subject feels anchored
Background replacement is one of the most common moments when people want a stronger sense of depth. After using Backgrounds to remove and replace the original backdrop, the subject can look clean but slightly detached from the new scene. The fix is usually a combination of edge cleanup, preserving any usable natural grounding, and softening selected transitions.
Picture a portrait where the busy original background has been replaced with a simpler one. The person looks good, but the lower edge of the body and the space around the feet or chair feel too cut out. Clean any leftover edge distractions, then use Blur carefully in selected areas so the result blends more naturally into the new background.
This is also useful for ecommerce-style edits. A product shot with a replaced backdrop often needs a little visual anchoring at the base. Even without a dedicated synthetic shadow generator, you can improve realism by keeping any natural contact darkness that survived the cutout and refining the surrounding area so it reads as intentional.
Each workflow fits a different type of image. Refining an existing shadow works well for products on a tabletop. Selective Blur is helpful when a portrait or object edge feels too hard after retouching. Background finishing is the right approach when a replaced backdrop makes the subject feel like it is floating.
The common theme is restraint. Good mobile shadow work is about believable depth, not dramatic compositing. If the viewer notices the effect before they notice the subject, the edit is probably too heavy.
One practical advantage here is export quality. TouchRetouch preserves original photo quality and EXIF data on export, which is useful when you are preparing polished images for listings, social posts, or client review from a mobile device.
Download TouchRetouch for free on iOS and start removing unwanted objects today. Download TouchRetouch for free on Android and start removing unwanted objects today.
Step-by-step examples for products, portraits, and cars
Product photo on a plain surface
Product photos are one of the easiest places to improve depth on mobile because the lighting and surface are often simple. If you are photographing a candle, bottle, mug, or small gadget on a table, start by cleaning the scene before trying to make it feel more grounded.
- Open the image and zoom in around the product base.
- Use Remove Objects to clear dust, cords, labels, crumbs, price tags, or small background clutter.
- If the product already has a natural contact shadow, leave that area intact as much as possible.
- Use Restore if your cleanup removes part of the useful shadow.
- If the shadow edge looks too harsh after retouching, apply Blur selectively to soften the transition.
The expected result is a cleaner product image that still feels connected to the surface. This kind of photo shadow effect is subtle but effective for marketplace listings and social content because it adds depth without making the edit look processed.
Portrait after background replacement
Portraits need a lighter touch. After using Backgrounds to replace the original backdrop, the person may look too sharply separated from the new scene. That usually shows up around hair edges, shoulders, lower clothing edges, or the area where the subject meets the floor or chair.
- Replace the background with Backgrounds.
- Inspect the outline of the subject and remove small distractions or leftover artifacts.
- Use Clone Stamp only where automatic cleanup needs refinement.
- Preserve any natural grounding detail that still supports the scene.
- Use Blur carefully on selected edges so the portrait feels less like a flat cutout.
The expected outcome is not a dramatic studio composite. It is a cleaner portrait with softer transitions and more believable separation from the backdrop. For many everyday edits, that is enough to make the image feel polished.
What to know if you want to add shadow to car image edits
If you want to add shadow to car image workflows on mobile, it helps to set expectations early. TouchRetouch is a mobile photo editing app focused on cleanup and retouching, not a full desktop compositing suite for advanced automotive shadow rendering. That means it is best used to improve the scene you already have, not to build a studio-style car composite from scratch.
There is still a lot you can do. Car photos often benefit from removing signs, wires, unwanted people, reflections in the background, and roadside clutter. Those distractions pull attention away from the vehicle and make any later finishing look less convincing.
- Clean the area around the vehicle with Remove Objects or Erase AI for obvious distractions.
- Use Line Removal for overhead wires or poles crossing the frame.
- Inspect the ground shadow under the car and preserve it if it matches the visible light.
- Refine rough areas with Clone Stamp if the pavement or road texture becomes uneven.
- Use Blur only to soften distracting transitions, not to invent a new complex car shadow.
Realistic car shadow work depends heavily on the original scene. A car shot in direct sunlight on textured pavement behaves very differently from a car photographed on an overcast day in a parking lot. The more complicated the ground texture and lighting, the more important it is to work with the photo you already have rather than expecting full synthetic rendering on mobile.
In practice, the best car edits come from preserving useful natural light cues. If the vehicle already casts a believable shadow, clean around it and make that area look intentional. If the original shadow is missing or inconsistent, focus on cleanup and subtle finishing instead of forcing an effect that does not match the scene.
What TouchRetouch can and cannot do for shadow edits
Useful tools for cleanup and finishing touches
For this topic, the most relevant TouchRetouch tools are Remove Objects, Erase AI, Clone Stamp, Blur, and Backgrounds. Together, they support the practical parts of shadow photo editing: cleaning the scene, removing unwanted shadows, refining rough areas, replacing backgrounds, and softening selected transitions.
Erase AI is especially useful when a shadow is distracting rather than helpful. It is designed to remove background people and other distractions, including shadows, while keeping the main subject unchanged. That makes it a strong starting point when the existing dark area is hurting the composition.
Where mobile retouching works well
TouchRetouch works well when the image already has a decent lighting foundation. Product shots on simple surfaces, portraits with clear subject separation, and casual ecommerce photos are good examples. In these cases, cleanup and subtle finishing often do more for realism than a heavy effect would.
The app is also useful when you need to polish a photo on the go. It is available on iOS and Android, and it is built specifically for photo retouching rather than broad, desktop-style compositing. Apple selected TouchRetouch as an Editors’ Choice app, which is a helpful signal of quality and usability for mobile users.
When the scene may need more advanced software
There are clear limits. TouchRetouch does not list a dedicated synthetic shadow generator, and it should not be described as a desktop-grade compositing tool. It also does photo editing only; it does not support video editing.
Results depend on scene complexity, background texture, and the quality of the original image. Automatic removal works best on simpler backgrounds, while heavily textured scenes may need manual refinement with Clone Stamp. The honest positioning is straightforward: TouchRetouch is best for practical mobile retouching and cleanup that supports a more believable final image.
Best practices, pricing, and how to get started
Tips for believable depth on mobile
If you want a realistic result, start with the cleanest original photo possible. Match the visible light direction, keep edits subtle, and zoom in around the base of the subject before exporting. Comparing before and after often helps you catch over-editing early.
Preserve natural shadows whenever you can. A real contact shadow under a product, shoe, chair, or vehicle usually looks better than trying to force a darker shape into the scene. When you do need to refine the image, use cleanup and selective Blur to support the original lighting instead of fighting it.
Another good habit is to edit in stages. First remove distractions, then inspect the subject edge, then decide whether the existing shadow should stay, be softened, or be removed. That order keeps the image coherent and makes it easier to spot what is actually causing the flat look.
Freemium pricing disclosure
TouchRetouch is free to download; premium AI features require a paid subscription. Check the App Store or Google Play for current pricing, which varies by region.
For this topic, that matters because premium AI features include Blur and Backgrounds. If your workflow involves softening transitions after cleanup or replacing a backdrop and refining the final look, those features may require a subscription.
Download TouchRetouch for iPhone, iPad, and Android
TouchRetouch is available on iOS and Android. On Apple devices, it supports iPhone and iPad, and it is developed by ADVA Soft for mobile-first photo cleanup and retouching.
If you want a simple way to clean up distracting elements before refining depth, this is a practical place to start. Download TouchRetouch for free on iOS and start removing unwanted objects today. Download TouchRetouch for free on Android and start removing unwanted objects today.
If Apple recognition matters to you when choosing apps, TouchRetouch was selected as an Editors’ Choice app by Apple. That does not change the workflow advice above, but it does reinforce the app’s focus on polished, user-friendly mobile editing.
Frequently Asked Questions
Can I create a realistic shadow on mobile without desktop software?
Yes, within limits. The most believable mobile approach is usually to preserve and refine an existing shadow, clean the surrounding area, and soften harsh transitions where needed. That works well for products, portraits, and simple ecommerce photos.
Does TouchRetouch have a dedicated tool to generate a new shadow from scratch?
No. TouchRetouch does not list a dedicated synthetic shadow generator. It is better used for cleanup, unwanted shadow removal, selective Blur, and finishing edits after background replacement.
Can TouchRetouch remove unwanted shadows from a photo?
Yes. Erase AI can remove distractions including unwanted shadows, and other tools such as Remove Objects and Clone Stamp can help refine the result. The final quality depends on the background texture and scene complexity.
What is the best way to make a product photo look less flat after background replacement?
The best approach is to keep any natural contact shadow that still makes sense, clean the area around the product, and soften overly hard transitions with Blur. Subtle grounding usually looks more natural than a dramatic effect.
Can I use TouchRetouch for car photo shadow edits?
Yes, for practical cleanup and refinement. It can help remove signs, wires, people, and other distractions around the vehicle, and you can preserve or refine an existing ground shadow where possible. For advanced synthetic automotive compositing, more specialized software may be needed.
A good mobile shadow edit is usually a cleanup problem first and a depth problem second. If the scene is tidy, the light direction is clear, and the original grounding cues are preserved, the final image feels much more natural.
That is the most useful way to add shadow to image edits on mobile with TouchRetouch: keep what already works, remove what distracts, and refine the transitions that make a subject look flat. If you want to clean up a photo before finishing it, TouchRetouch gives you a practical set of tools for iOS and Android without overcomplicating the process.
FAQ
How can I add shadow to image edits on mobile?
You can add shadow to image edits on mobile by placing the subject on a separate layer, creating a soft dark shape beneath it, and adjusting blur, opacity, and position for a realistic result.
What makes a photo shadow effect look realistic?
A realistic photo shadow effect usually depends on matching the light direction, keeping the shadow soft, lowering the opacity, and placing it naturally under or behind the subject.
Can I do shadow photo editing on a phone without advanced skills?
Yes, shadow photo editing on a phone is possible for beginners because most mobile editing apps include layer, blur, opacity, and transform tools that make the process straightforward.
How do I add shadow to car image edits on mobile?
To add shadow to car image edits on mobile, create a low, wide shadow under the vehicle, soften it with blur, and align it with the car’s angle and the scene’s light source.