Getting rid of glare in camera shots starts with one simple idea: prevention beats repair. Glare is easiest to avoid before you tap the shutter, but many small reflections, bright streaks, and light artifacts can still be cleaned up afterward with the right editing approach.
If you have ever taken a great photo only to notice a white streak near the edge, a reflection on glass, or a hazy patch from a smudged lens, you are not alone. These problems are common in everyday phone photography, especially around windows, indoor lights, shiny products, and direct sun.
This guide explains what causes camera glare in photos, what you can prevent while shooting, and what editing can realistically improve later. The goal is practical: capture the cleanest image possible first, then retouch only the leftover distractions that actually pull attention away from the subject.
What causes glare in photos and what can actually be fixed
Why lens flare, haze, reflections, and blown highlights are not the same thing
Not all glare problems are the same, and that matters because each one needs a different fix. A greasy fingerprint on a phone lens often creates a soft haze across the frame, while direct sunlight hitting the lens can create flare, colored spots, or bright streaks.
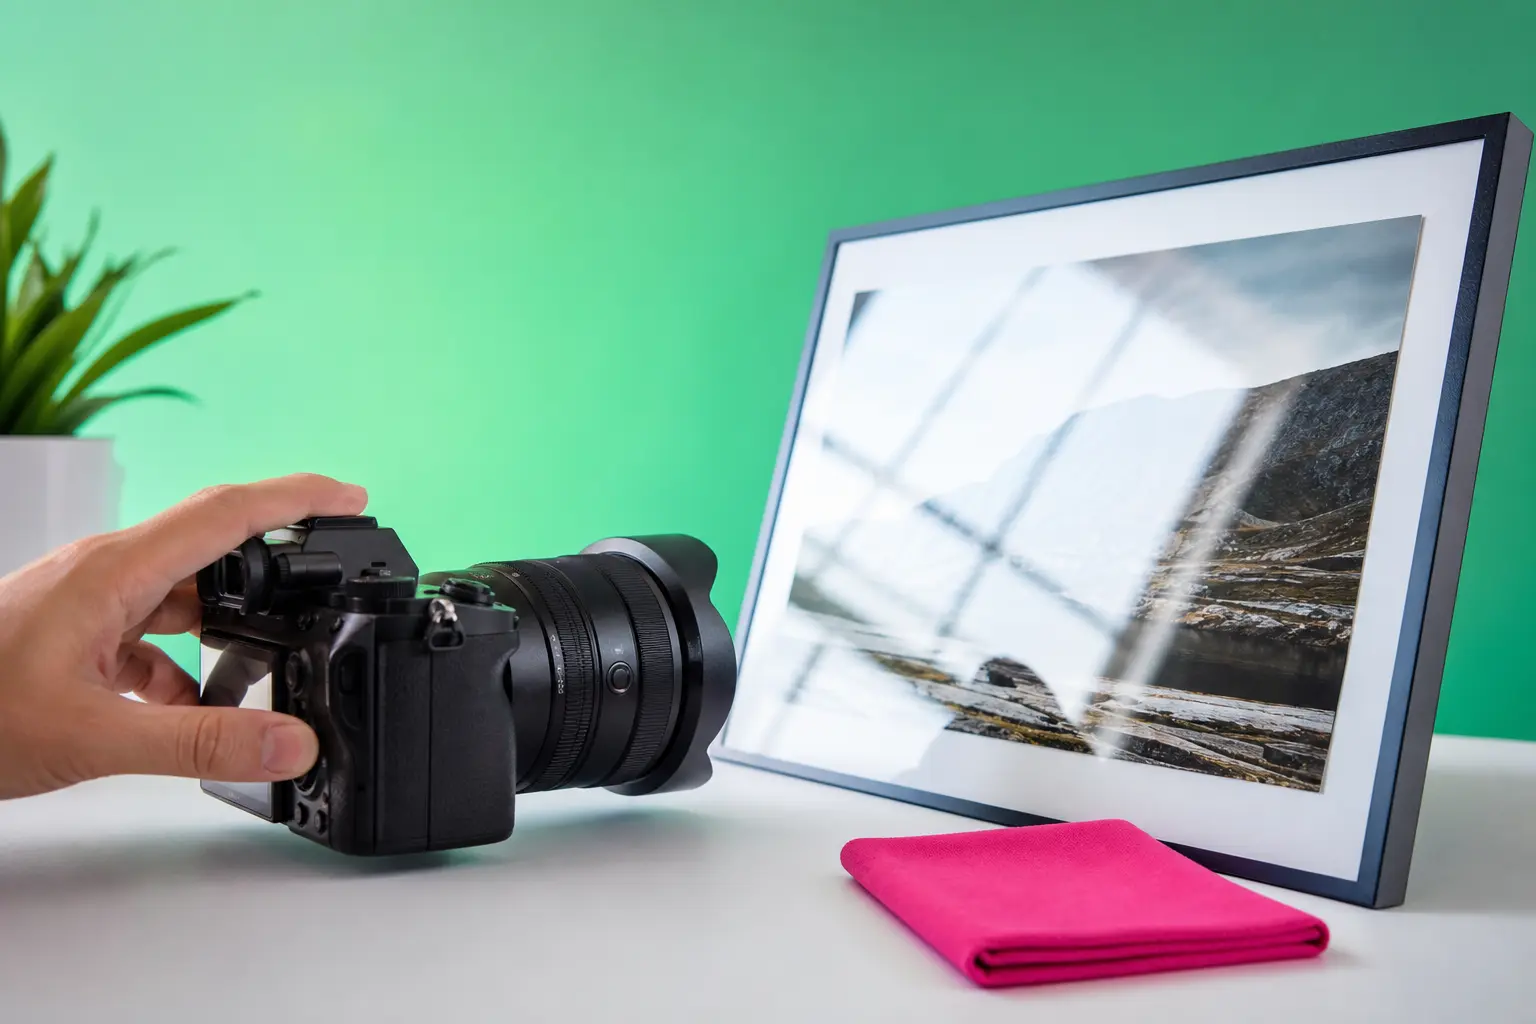
Reflections are another category. These usually happen when light bounces off glass, screens, glossy packaging, framed art, or eyeglasses and travels straight into the camera. By contrast, blown highlights happen when part of the image becomes so bright that the original detail is no longer recorded.
What you can prevent while shooting
The best way to deal with glare is still prevention during capture. A clean lens, a slightly different shooting angle, or moving one lamp in a room often does more than any later edit.
That is especially true when the glare covers important detail such as eyes behind glasses, text on a sign, or texture on a product label. If the original pixels are washed out completely, editing cannot fully rebuild what was never captured.
What post-edit cleanup can realistically improve
Editing works best when the problem is small, localized, and surrounded by similar texture. A bright dot in the sky, a narrow streak on pavement, or a reflection on a plain wall is often a good candidate for cleanup.
Broad exposure problems are different from small distracting artifacts. This article covers both, but the main workflow is simple: reduce lens flare and reflections while shooting, then use targeted retouching only where needed. That approach gives you a more natural result than trying to rescue a badly glared image from scratch.
Prevent glare before you take the shot
Clean the lens to remove smears that spread light
If you want to prevent glare in photos, start with the lens. Fingerprints, dust, sunscreen, makeup residue, and pocket lint can turn a tiny highlight into a large foggy patch that lowers contrast across the whole image.
Phone cameras are especially vulnerable because they are handled constantly. A quick wipe with a clean microfiber cloth before shooting often removes the source of the problem immediately. If you do not have a cloth, use a soft clean fabric rather than a shirt sleeve with grit on it.
This matters most in strong light. For example, a sunset scene, a streetlight at night, or a bright window indoors can all look much hazier when the lens has oily smears on it.
Change your shooting angle to break the reflection path
Small angle changes are one of the easiest fixes for glare. Move a little left or right, crouch slightly, raise the phone a few inches, or tilt it just enough to stop the reflection from bouncing into the lens.
That simple move often works because reflections follow a path. If the light source, reflective surface, and camera line up, you see glare. Break that alignment, and the reflection often disappears or shifts to a less distracting part of the frame.
This is useful for everyday situations like photographing a café window, a framed poster, a laptop screen, or a glossy plate of food. In many cases, a tiny reposition works better than trying to fix glare in pictures later.
Use shade to soften harsh light outdoors
Outdoor light can be beautiful, but direct sun also creates strong flare and washed-out contrast. Shade helps by reducing the intensity of stray light entering the lens.
Look for simple options: stand under a tree, move beside a building, step under an awning, or use your body or hat brim to block side light. If clouds are moving quickly, waiting a moment for softer light can also improve the shot.
For phone photography, this is often more practical than carrying extra gear. A portrait taken in open shade usually has cleaner contrast and fewer bright artifacts than the same portrait shot facing strong midday sun.
Avoid pointing toward strong direct light when possible
Direct light sources are a common cause of flare. The sun, headlights, stage spotlights, and bare bulbs can all send bright rays or ghosting into the lens, especially near the edge of the frame.
If that look is intentional, keep it. But if you want a cleaner image, change your position so the light is behind you, blocked by an object, or just outside the frame. Even shifting a few steps can reduce lens flare and reflections dramatically.
For example, if you are photographing a person near a bright window, turning them slightly away from the direct beam often gives a clearer result. If you are shooting a car at night, moving so headlights are not aimed into the lens can remove distracting streaks.
Reposition indoor lamps and overhead lights
Indoor glare often comes from bulbs reflecting on shiny surfaces. A ceiling light can bounce off glasses, a table lamp can reflect in a TV screen, and a bright kitchen fixture can show up on framed art or polished countertops.
Try changing one variable at a time. Turn off one overhead light, move a lamp to the side, rotate the object, or shift the subject a little. In a portrait, asking someone to lower or raise their chin slightly can reduce reflections on lenses without changing the whole pose.
These are not studio-only tricks. They work for everyday photos of people, meals, products for resale, home interiors, and travel snapshots. In most cases, small position changes are faster and more effective than repairing a badly glared image afterward.
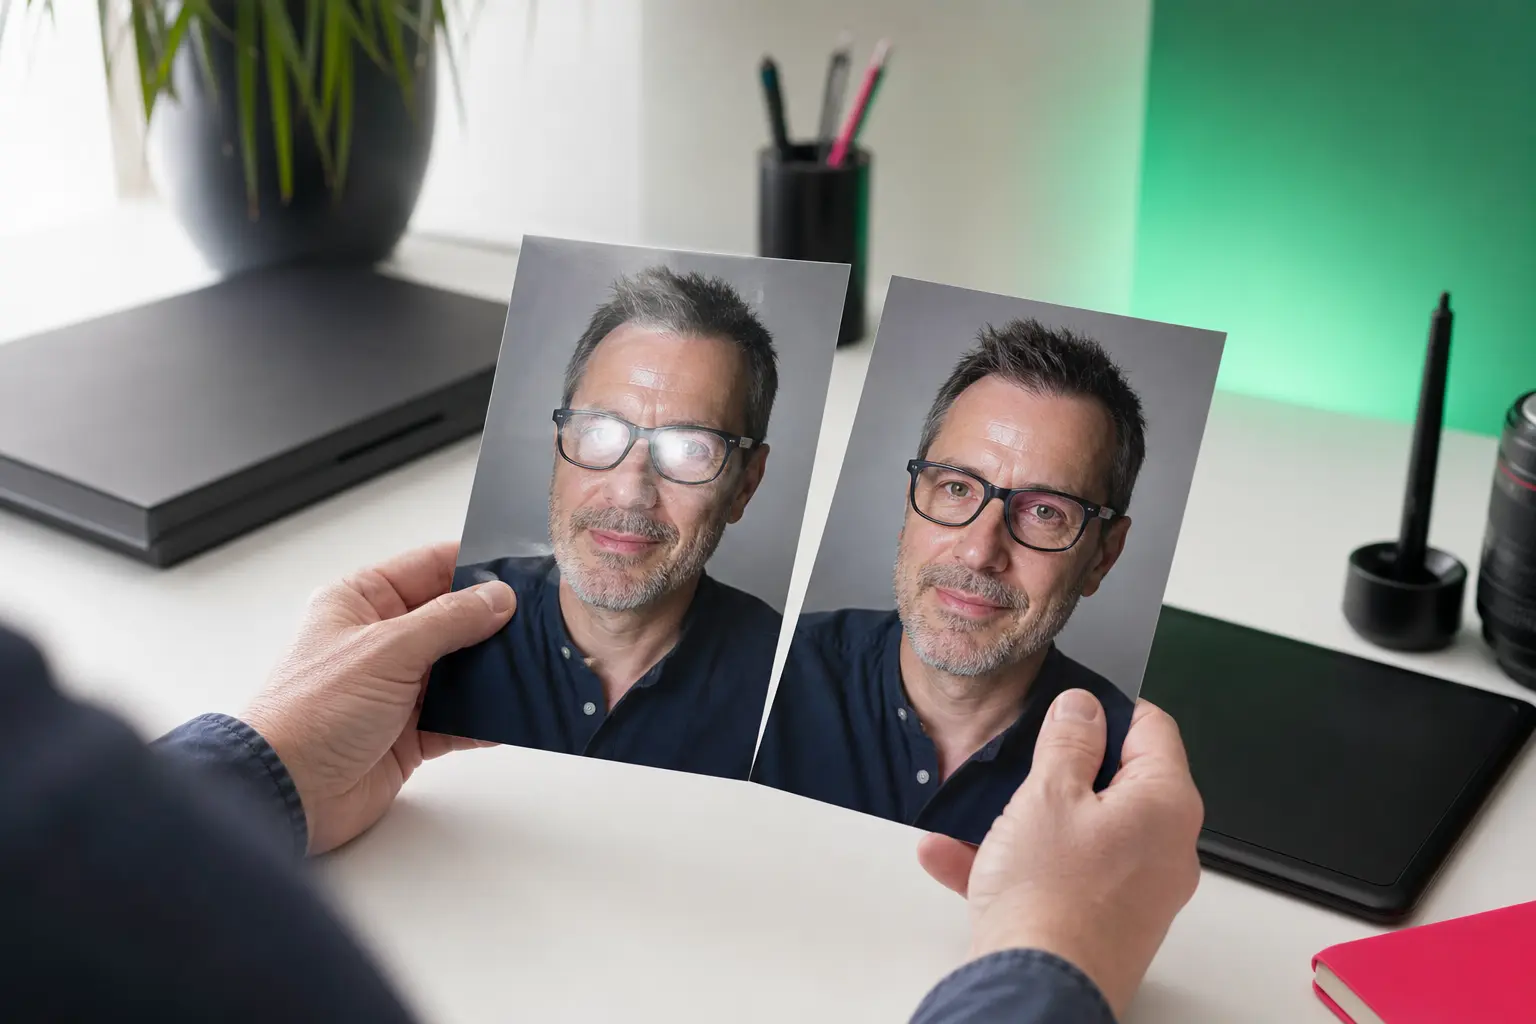
If reflections on eyewear are your main issue, see how to remove glare from glasses in photos.
Simple shooting adjustments for common glare situations
When photographing through windows or glass
Glass adds an extra reflective surface, so the first priority is reducing what the glass reflects back at you. Place the lens closer to the window when possible and avoid having bright light behind you, since that often creates a visible reflection of the room or of yourself.
If you are taking a photo from inside a car, train, shop, or apartment, angle matters even more. Pressing the phone close to the glass and shifting away from overhead lights often helps reduce lens flare and reflections at the same time.
When glare appears on glasses, screens, or glossy objects
Glasses glare usually changes when either the light source or the subject moves. Ask the person to tilt their face slightly, lower their chin, or turn a little away from the lamp or window.
Screens and glossy products behave similarly. A reflection on a tablet, framed print, or cosmetic bottle often slides away with a small reposition of either the object or the camera.
When bright streaks cut across the image
Bright streaks often come from direct light hitting the edge of the lens or from smudges spreading the light. Clean the lens first, then change your angle and see whether the streak moves or disappears.
If the streak stays in the same place across multiple shots, check for residue on the lens. If it changes with your position, the cause is usually the light path rather than dirt.
When the whole frame looks washed out
A washed-out photo usually points to broad haze rather than one small reflection. Strong side light, direct backlight, or a dirty lens can lower contrast across the entire frame and make blacks look gray.
Use a quick decision rule here: if the glare covers important detail, reshoot if possible. If the artifact is small, off to the side, or sitting over a simple background, editing may be enough to clean it up.
How to get rid of glare in camera photos with TouchRetouch
When localized glare is a good candidate for cleanup
Once you have captured the best version of the image, editing can help remove leftover distractions. This is where getting rid of glare becomes a retouching question rather than a shooting question.
TouchRetouch, made by ADVA Soft in Berlin, is a photo-retouching app for iPhone, iPad and Android built around object removal.
For glare cleanup, the app is most useful when the artifact is localized and the surrounding area gives enough visual information to rebuild naturally. Think of a bright dot in the sky, a small reflection on a wall, a narrow streak over pavement, or a hotspot in water where nearby texture repeats.
It is less effective when the glare is huge or when it erased critical detail completely. A large white window, overexposed skin, or a reflection covering text may still look limited after editing because the original information is missing.
Using Remove Objects for bright spots and small reflections
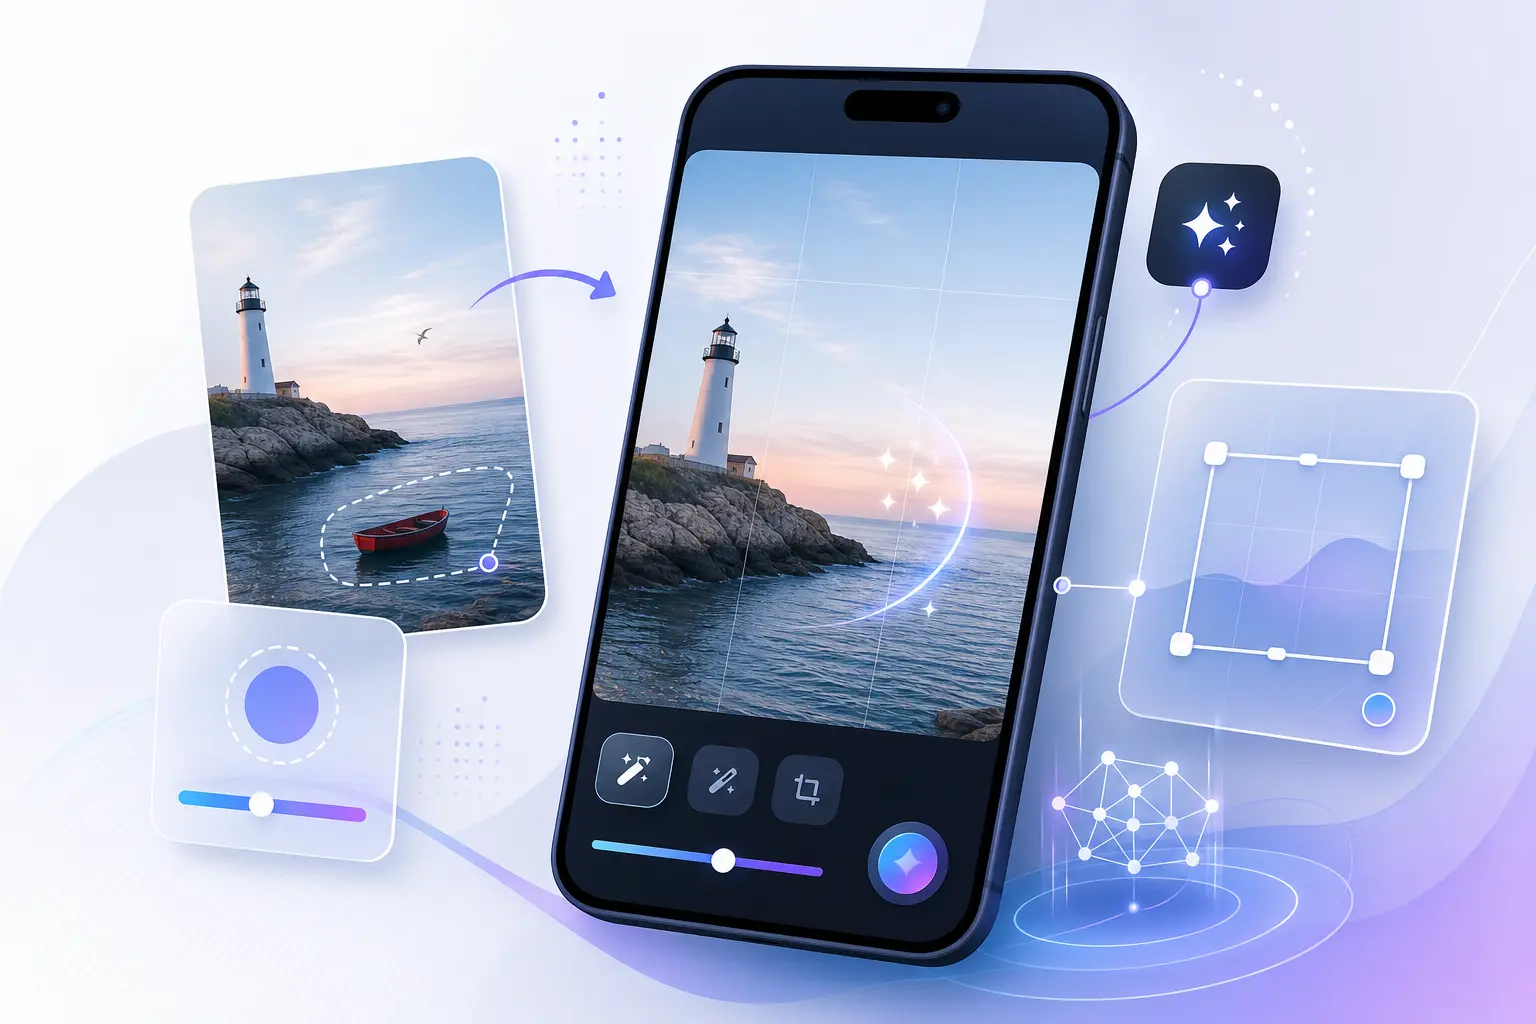
The core tool for this job is Remove Objects. You mark the glare patch with the Brush tool or select it with the Lasso, then the app fills the area using nearby texture and color.
This works well for compact distractions. For example, if a small white flare dot sits in a blue sky, or a bright reflection lands on a plain painted wall, the surrounding area is simple enough for object removal to blend cleanly.
The same approach works for glare on sidewalks, fabric, sand, water, and other surfaces with repeatable texture. The key is to select only the distracting part, not a large chunk of the image around it.
If you want a broader overview of object removal on mobile, see this guide on remove objects from photos on iPhone and Android.
Using Erase AI for distracting light artifacts around the subject
Erase AI, one of the premium AI tools that come with a subscription, can also help in some cleanup situations, especially when the distracting element is isolated and the main subject should remain untouched. The feature is designed to identify and remove certain distractions while protecting the subject area.
In glare-related edits, that can be useful when a bright artifact sits near the subject but is not part of the subject itself. A small reflective distraction in the background, a hotspot near a shoulder, or a stray light-related element off to one side may be a good fit.
Results depend on scene complexity, image resolution, and how clearly separated the artifact is from the subject. Some AI-powered features also require an internet connection, so that is worth knowing before you start editing.
Using Clone Stamp when automatic cleanup needs refinement
Automatic removal is often the best first pass, but some images need a little manual help. Clone Stamp is the refinement tool for copying nearby texture over stubborn reflective spots or uneven cleanup areas.
This is especially useful near edges and contours. If a reflection sits close to a jawline, product outline, window frame, or patterned fabric, manual retouching gives you more control over where the replacement texture comes from.
For example, if a bright streak crosses a plain shirt but leaves a slightly soft patch after automatic removal, Clone Stamp lets you sample clean fabric from a nearby area and blend it over the remaining artifact. The same idea works on walls, roads, skies, and simple backgrounds.
TouchRetouch is designed to help remove distractions from photos, not recreate detail that was never captured. Severe blown highlights, large white patches, or glare that completely erased texture may not be fully recoverable, even with careful retouching.
That said, the app is a strong option for everyday mobile cleanup because it focuses on removing unwanted elements simply and directly. It also preserves original photo quality and EXIF data on export, which is useful if you want to keep image information intact after editing.
For a closer look at the main removal tool, see Remove Objects.
A practical cleanup workflow for reflections and bright artifacts
Step 1: Zoom in and identify the smallest area to retouch
Good glare cleanup starts with restraint. Zoom in and identify the exact part of the glare that is distracting, whether that is a bright dot, a short streak fragment, or a compact reflection patch.
Do not paint over a large area unless you have to. The smaller and more precise the selection, the easier it is for the app to rebuild the area naturally from nearby texture.
Step 2: Start with automatic object removal
Use Remove Objects first for small bright spots, narrow streaks, or isolated reflections. Brush over the artifact or use the Lasso if the shape is easier to outline, then let the app fill the area.
This works best on skies, walls, pavement, water, fabric, and other surfaces where nearby visual information repeats. If the first pass removes too much, use Restore and make a tighter selection on the second pass.
Step 3: Refine edges and texture with Clone Stamp
Switch to Clone Stamp when the glare sits near important edges or detailed shapes. Facial contours, product outlines, patterned clothing, railings, and text-adjacent areas often need more control than automatic fill can provide.
Sample from the cleanest nearby area that matches the texture and brightness. Then build the repair gradually so the replacement blends with the scene instead of looking copied from the wrong direction or surface.
Step 4: Compare before and after for natural-looking results
After retouching, zoom back out and check the full image. A cleanup that looks fine at high magnification can still appear uneven when viewed as a whole.
Look for repeating patterns, soft patches, or edges that suddenly look too smooth. Highly detailed eyes, logos, printed text, and intricate reflections need extra care, and sometimes the most natural result is a partial cleanup rather than a complete removal.
For broader cleanup of cluttered photos, see the photo cleaner page.
When editing works well and when a reshoot is the better choice
Best-case scenarios for mobile retouching
Editing works well when the glare is small and the surrounding area is easy to reconstruct. Good examples include lens flare dots in the sky, narrow bright streaks on pavement, minor reflections on background walls, and isolated hotspots away from faces or text.
These are the situations where a mobile tool can often fix glare in pictures cleanly without changing the overall look of the shot. If the app has enough surrounding visual context, the repair is more likely to blend naturally.
Situations where missing detail limits the result
Some cases are much harder. A large blown-out window, strong glare across the eyes, overexposed skin, or a reflection covering important text or product texture leaves very little information to work with.
TouchRetouch is designed to remove distractions from photos, not invent missing detail. If the glare completely erased what was underneath, the result may improve visually but still not look fully natural.
How to decide between cleanup and retaking the photo
Use a simple rule: if the glare sits on a background area, try editing first. If it covers the subject’s face, key product details, or readable text, a reshoot is usually the better choice.
The most reliable approach is combining better shooting habits with selective editing. That gives you cleaner source images, faster cleanup, and more realistic results on a phone. For overall image quality, these tips for better photo quality on your phone are a good next step.
Download TouchRetouch and clean up distracting light artifacts
Who the app is for
TouchRetouch is built for everyday mobile users who want to remove unwanted objects and distractions from photos on the go. It is especially useful for cleaning up small reflections, bright spots, streaks, and other localized visual clutter.
Where to get it on iPhone and Android
The app is available on iOS and Android. TouchRetouch is free to download; premium AI features require a paid subscription. Check the App Store or Google Play for current pricing, which varies by region.
Get TouchRetouch on the App Store or on Google Play.
What to know before you start editing
Some AI-powered features require an internet connection. Results also depend on scene complexity, background texture, and image resolution, so small localized artifacts usually clean up better than large blown-out areas.
That said, if you already have a strong photo with one annoying reflection or streak, the app gives you a practical way to improve it without moving to a desktop editor.
Key takeaways for clearer, cleaner photos
The prevention-first mindset
Cleaner photos usually start before editing. Wipe the lens, change your angle, use shade outdoors, avoid direct strong light when possible, and reposition indoor lamps when reflections show up on glass, screens, or glossy surfaces.
The realistic role of retouching
Editing is most helpful for localized issues such as small flare dots, narrow streaks, and minor reflections over simple backgrounds. Severe blown highlights are different because the missing detail often cannot be fully recovered.
A simple plan for your next shoot
For your next photo, use a quick checklist: clean lens, check the light source, move a few inches, take a second frame from a slightly different angle, then retouch only the leftover distractions. That is the most reliable way to get clearer photos without reflections.
When a good image is spoiled by one small artifact, getting rid of glare does not have to be complicated. Shoot carefully first, then use TouchRetouch to clean up the distractions that remain.
Frequently Asked Questions
Can glare be removed from a photo after it is taken?
Yes, some glare can be removed after the photo is taken, especially if it is small and localized. Bright dots, narrow streaks, and minor reflections over simple backgrounds are usually the best candidates for retouching. Large blown-out areas are much harder because the original detail may be missing.
Why does a dirty lens make glare look worse?
A dirty lens spreads incoming light across the glass, which turns small highlights into haze, streaks, or foggy patches. Fingerprints and oily smears are especially noticeable around windows, sunsets, streetlights, and indoor bulbs. Cleaning the lens often improves contrast immediately.
What is the best angle to avoid reflections in photos?
The best angle is usually any angle that breaks the direct reflection path between the light source, the reflective surface, and the camera. In practice, that often means moving slightly left, right, up, or down. Even a small shift can remove reflections from glass, screens, and glossy objects.
Can TouchRetouch remove bright streaks and small reflections?
Yes, TouchRetouch can help remove bright streaks and small reflections when they are localized and the surrounding area provides enough texture to rebuild naturally. Remove Objects is a good first tool for compact artifacts, and Clone Stamp can refine difficult edges. Results depend on scene complexity and image resolution.
What kind of glare is usually impossible to fully recover?
Glare that completely blows out detail is usually the hardest to recover. Examples include large white windows, overexposed skin, or reflections covering eyes, text, or important product texture. In those cases, a reshoot is often the better option if it is still possible.