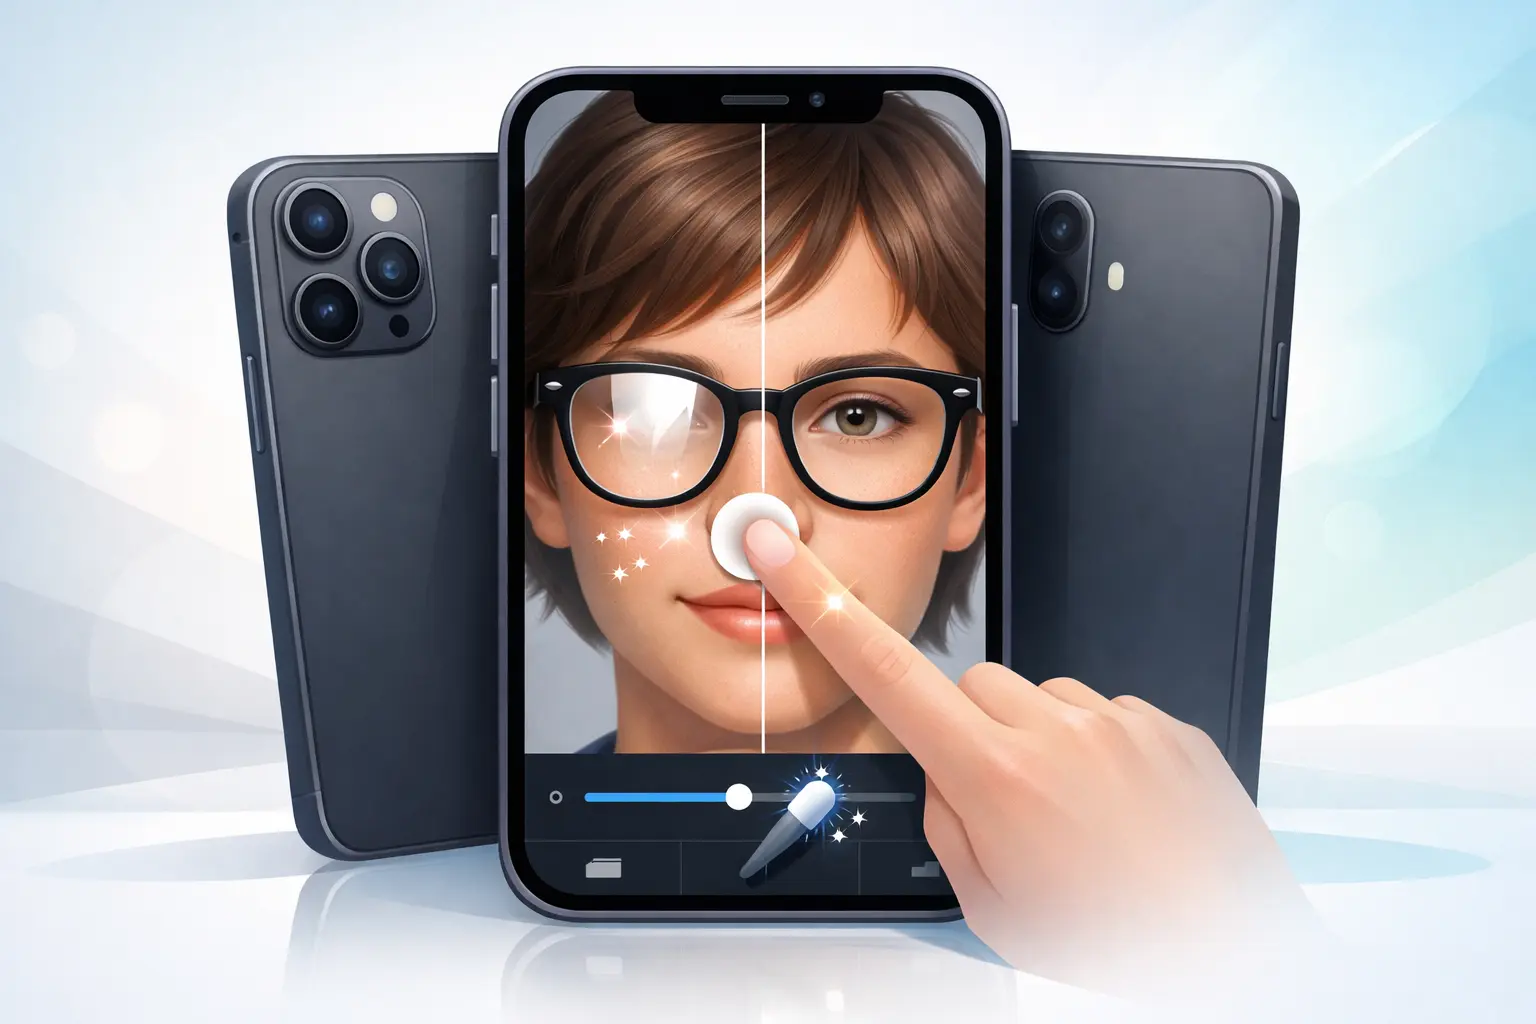
If glare is hiding part of the eyes or pulling attention away from a portrait, you can often remove glasses glare from photo enough to make the image feel cleaner and more natural. The key is knowing what kind of reflection you are dealing with and using realistic retouching methods on your phone.
No mobile editor can perfectly rebuild detail that was never captured. If a bright white patch completely covers the eyes, the goal is usually to reduce distraction, soften the hotspot, and make the portrait look more balanced rather than promise a flawless reconstruction.
This guide explains what glare actually is, when cleanup works, how to approach it in TouchRetouch on iPhone and Android, and what to do before you take the photo so you have less to fix later.
What kind of glare or reflection are you actually seeing?
Glasses glare vs lens reflections
Before you edit, identify the problem correctly. When people search How remove glare from glasses, they are often describing a few different issues that look similar but behave differently in editing.
Glasses glare usually means bright hotspots, white patches, or shiny streaks on eyeglass lenses caused by light hitting the glasses at a strong angle. This is common with indoor lamps, flash, overhead lighting, or a bright window just outside the frame.
Lens reflections are slightly different. These are visible reflections inside the glasses from a phone screen, window, lamp, computer monitor, or another object in the environment. Instead of a plain white patch, you may see shapes, lines, or mirrored scenes sitting on top of the eyes.
Sun flare vs general reflections in photos
Another common issue is sun flare. This happens when strong sunlight hits the camera lens itself, not just the glasses. It can show up as haze, washed-out contrast, circles, streaks, or colored artifacts crossing the frame. If you want to remove sun glare from photo results, that often requires a different approach than fixing eyeglass reflections.
Then there are general reflections in photos. These can appear on windows, water, mirrors, polished furniture, car surfaces, or glass doors. In that case, you may want to remove reflection from photo distractions that have nothing to do with eyeglasses at all.
For example, a white hotspot on one eyeglass lens is not the same problem as a pink flare streak across a face. A reflected window grid in the lens is also different from a washed-out image caused by direct sun hitting the phone camera.
Why the type of glare changes your editing options
The type of glare changes what is realistic. A small hotspot near the rim of the glasses is often a good candidate for retouching. A large reflection covering both pupils is much harder because the original eye detail may not exist in the photo.
This is why one editing method will not solve every case. Automatic removal tends to work better on simple areas such as a lens edge, frame highlight, cheek reflection, or plain background near the face. More complex areas like eyelashes, irises, eyebrows, and layered reflections usually need manual cleanup.
Set your expectations early. If glare fully covers the eye area, editing may reduce the distraction but not restore the exact eye detail underneath. That is true whether you are using a mobile retouching app, a desktop editor, or an online tool.
This article is both an editing guide and a prevention guide because search results often mix those two intents. Some readers want to fix an existing portrait, while others want to know how to avoid the problem next time.
- Bright white patches on lenses = glasses glare
- Visible windows, lamps, or screens in lenses = reflections
- Haze, circles, streaks, or washed contrast = sun flare on the camera lens
- Mirrored distractions on other shiny surfaces = general reflections
Once you know which problem you have, it becomes much easier to choose the right tool and decide whether the photo is worth editing at all.
Can you fix glare in a portrait with TouchRetouch?
What TouchRetouch can help with
TouchRetouch, developed by ADVA Soft GmbH in Berlin, Germany, does not offer a dedicated one-tap glasses-glare remover. That matters because many pages overpromise Remove glasses glare from photo AI results that are not realistic for portrait retouching.
Even without a special glasses-glare button, the app can still improve many portraits. Remove Objects can help with small bright patches, Clone Stamp can repair uneven texture manually, Blur can soften harsh remnants, and Restore can bring back edges if you selected too much.
This makes it a practical option when glare affects only part of one lens, the outer edge of the glasses, the frame, or nearby skin. If the reflection sits partly on the cheek or eyebrow rather than directly over the pupil, cleanup is usually more believable.
What TouchRetouch does not claim to do
It is important to be direct here: TouchRetouch is not a magic eye-reconstruction tool. It does not claim to recover missing facial detail that the camera never captured, and it does not edit video. It is a mobile photo editor for iOS and Android only.
Automatic cleanup works best on simpler areas. Facial features and layered reflections often need careful manual work, especially when the glare overlaps eyelashes, the bridge of the glasses, or the iris.
If you are also dealing with flare elsewhere in the frame, this guide to removing glare from photos can help you think through the broader problem before you start retouching.
When partial cleanup is realistic
If you are looking for the best app to remove glare from glasses, the honest answer depends on the image. TouchRetouch is strongest when the job is really object removal and manual cleanup rather than full tonal reconstruction.
A good example is a portrait where one small white patch sits near the top of the left lens and the eye is still partly visible. Another example is a reflection from a window edge that clips the frame and eyebrow but leaves most of the pupil visible. In both situations, the app gives you enough control to reduce the distraction naturally.
Results depend on scene complexity, photo resolution, and how much of the lens area is covered. The less missing detail there is, the more convincing the final cleanup tends to look.
Step-by-step: remove glasses glare from photo with manual cleanup
Start with the smallest bright areas first
The safest way to remove glasses glare from photo edits is to work in short, precise passes. Do not select the whole lens immediately. Large selections over eyes and frames often produce uneven fills because the app has to guess too much at once.
Open the image in TouchRetouch and zoom in deeply. Inspect where the glare actually sits: on the lens edge, frame, cheek, eyebrow, bridge of the glasses, or directly over the pupil. That quick diagnosis tells you whether the edit is mostly a cleanup job or a high-risk reconstruction attempt.
For example, a bright patch touching only the upper rim is much easier than a rectangular window reflection sitting across the iris. A hotspot on the cheek beside the glasses can often be treated almost like any other unwanted object.
Use Remove Objects on glare near the lens edge or frame
Start with Remove Objects. Use a small Brush or Lasso and target only the brightest fragments first. Think in pieces: one hotspot, one streak, one corner of reflection.
- Zoom in until the lens edge and skin texture are clearly visible.
- Select Remove Objects.
- Choose a small Brush size for precise control around the frame and eyelashes.
- Mark only the brightest part of the glare, not the full lens.
- Apply the removal and inspect the result before making another pass.
This approach works well when the glare sits near the frame edge, along the top of the lens, or on a simpler area beside the eye. It also helps if you want to edit reflection out of photo details that spill onto the cheek or temple.
If the first pass looks good, continue with another small fragment. If it looks uneven, stop and switch tools instead of forcing a larger automatic removal.
Refine missing texture with Clone Stamp
When the automatic fill leaves blotchy tone or repeated texture, move to Clone Stamp. This is the tool that gives you manual control over what replaces the glare.
Use a nearby source area that matches the surface you are repairing. On the lens, that may be a clean section of the same lens tone. On skin, it may be a nearby cheek area with similar brightness. On the eyebrow, sample from adjacent eyebrow texture rather than from skin.
Two common examples:
- If a white patch clips the eyebrow through the lens, copy a nearby eyebrow segment in tiny strokes.
- If the reflection sits on the frame, sample from a clean part of the frame so the shape stays consistent.
Keep your strokes short. Long Clone Stamp passes can bend the lens shape or create repeating patterns that look obvious once you zoom back out. The goal is not to invent a new eye. The goal is to rebuild believable surface texture where the glare broke it.
This is where many searches for remove glasses glare from photo AI run into reality: the best result often comes from patient manual repair, not a single automatic tap.
Soften leftover hotspots with Blur
After object removal and cloning, you may still see tiny hard-edged remnants. These are often too small to remove cleanly but still bright enough to catch attention. In that case, use Blur very selectively.
Apply Blur only to the harshest leftover specks or edges. A tiny amount can help the repaired area blend into the surrounding lens or skin. Too much will make the eye area look smeared, which is especially noticeable in portraits.
A good use case is a faint bright dot near the top of the lens after the main glare has been reduced. Another is a sharp transition line where a reflection used to cross the frame. Softening that edge slightly can make the retouch feel more natural.
Use Restore to bring back natural edges
If you accidentally selected too much around the eyelashes, frame, or bridge of the glasses, use Restore. This is one of the most useful finishing steps because portraits depend on crisp edges in the right places.
Restore helps recover details that should stay sharp, such as the rim of the glasses, the line of the eyebrow, or the contour where the lens meets the frame. If those edges become muddy, the edit starts to look artificial even if the glare itself is reduced.
- Inspect the repaired area at high zoom.
- Look for soft or warped edges around lashes, brows, and frame lines.
- Use Restore to bring back the original edge where needed.
- Zoom out and compare before and after.
- Repeat only if the glare is still distracting at normal viewing size.
Compare often. A retouch that looks impressive at 400% zoom can look overworked at normal size. If the portrait feels natural on the phone screen and the eyes no longer pull attention for the wrong reason, you are done.
That restraint matters. If you keep pushing, skin texture may start repeating, the lens may warp, or the repaired eye area may become softer than the rest of the face. Stopping early usually produces a better portrait than chasing a perfect but unnatural result.
TouchRetouch preserves original photo quality and EXIF data on export, which is helpful if you want to keep image details intact after cleanup.
Mobile tips for iPhone, Android, and Samsung users
How to approach glare cleanup on iPhone
If you want to remove glare from glasses iphone photos, precision matters more than speed. Use pinch-zoom aggressively so you can see the exact border between the glare, the lens edge, and the skin around the glasses.
On iPhone screens, small selections usually produce cleaner results than broad ones. Check the repaired area at both high zoom and normal view before exporting. A patch that looks smooth up close can shift skin tone slightly when viewed full-screen.
Pay special attention to the bridge of the glasses and the upper rim. Those areas often catch bright reflections, and they are also where over-selection becomes obvious fastest.
Android editing tips for precise retouching
The same workflow applies on Android. If you are searching for the best app to remove glare from glasses android, device brand matters less than careful selection and tool choice.
Use your phone’s zoom controls and screen brightness to inspect the repair. A brighter screen can reveal leftover hotspots, while a lower brightness setting can help you judge whether the edit still looks natural in everyday viewing conditions.
On any Android phone, avoid over-smoothing the eye area. Portraits look more believable when the texture around the glasses still matches the rest of the face.
What Samsung users should watch for
If your search is specifically How to remove glasses glare from Photo Samsung, the answer is that the process depends more on the editing app than on the phone model. Samsung phones can display very bright screens, which is useful for spotting tiny glare remnants, but the retouching logic stays the same.
Zoom in, work in small passes, and compare often. If the lens shape starts to bend or the eyebrow texture begins repeating, undo the last change and make a smaller selection. That is especially important on high-resolution portraits where small mistakes remain visible.
Download TouchRetouch for free on iOS and Android and start removing unwanted objects today.
TouchRetouch is free to download; premium AI features require a paid subscription. Check the App Store or Google Play for current pricing, which varies by region.
When glare removal works well—and when it probably will not
Good candidates for cleanup
Glare cleanup works best when the bright area is small, off-center, semi-transparent, or limited to one part of one lens. If you can still see some eye detail underneath, there is usually enough information to reduce the distraction convincingly.
Good examples include a small white hotspot near the upper corner of the lens, a reflection that touches the frame more than the pupil, or a faint window shape that leaves the iris mostly visible. In these cases, you can often remove reflection from photo distractions without making the portrait look over-edited.
Hard cases where detail is truly missing
Some images are simply poor candidates. If both lenses are fully blown out, the eyes are completely hidden, or a strong colored flare crosses the face, the missing detail is not available to recover.
The same is true when multiple reflections layer over eyelashes and pupils. If you need to remove color light from photo artifacts plus lens glare plus haze, the problem is no longer just object removal. It becomes a combination of exposure correction and manual retouching.
That is why honest expectation-setting matters. No mobile retouching tool can reliably recreate eye detail that was never captured in the original image.
Signs you should stop editing
Stop when the repair begins to create new distractions. Repeating skin texture, warped lens shape, blurry eyelashes, or a softer eye area than the rest of the face are all signs the cleanup has gone too far.
If you notice those issues, undo the last pass and accept a lighter correction. A portrait with a faint remaining reflection usually looks better than one with obvious retouch artifacts. This is also true when you are trying to edit reflection out of photo areas beyond glasses, such as windows or shiny surfaces.
When to consider Lightroom or online tools instead
Cases better suited to tonal and masking adjustments
Sometimes the issue is not only the reflection itself but also the overall brightness around it. In those cases, Remove glasses glare from photo Lightroom searches make sense because Lightroom can help with highlight reduction, local masking, exposure recovery, and balancing the whole portrait before manual retouching.
For example, if the glare is mild but the entire face is overexposed, tonal correction may improve the image before you do any object cleanup. If the reflection is small but the lens area is much brighter than the surrounding skin, local adjustments can make the repair easier.
When an online editor may be worth trying
If you specifically want browser-based editing, you may look for ways to Remove reflection from glasses in photo online. Online tools can be convenient when you do not want to install an app, but results vary a lot.
Check privacy terms, upload limits, export quality, and how realistic the edits look. Portraits with glasses are sensitive because even small changes around the eyes can look unnatural quickly.
How to choose the right tool for the job
Choose the tool based on the problem, not the trend. TouchRetouch is a strong mobile option when the job is object removal and manual cleanup on a phone. Lightroom may be better when the problem is strongly tied to highlights, masking, or overall exposure balance.
Some photos need both approaches. You may reduce brightness first in another editor, then use TouchRetouch to clean up the remaining hotspot or reflection edge. That is a practical workflow, not a contradiction.
If your main goal is to remove glasses glare from photo edits on a phone with precise manual control, TouchRetouch fits best when the reflection is localized and the original detail is still partly visible.
How to prevent glare before you take the photo
Change the angle of the face or glasses
The easiest fix is prevention. A tiny change in head angle, camera angle, or glasses tilt can redirect reflections away from the lens. Even a slight chin turn or a small adjustment of the frames can make one shot much cleaner than the one before it.
If you often need to remove sun glare from photo portraits later, start by changing the angle before you press the shutter. A small repositioning is easier than repairing blown-out lenses afterward.
Move the light instead of fighting it later
When possible, move the subject relative to the light source. Step away from a bright window, rotate slightly away from a lamp, or change position under overhead lights. Reflections follow angles, so moving the light or the subject often solves the problem immediately.
This also helps with camera flare. Direct sun can create both glasses glare and lens flare at the same time, which is much harder to clean up later. If needed, shade the phone lens with your hand or change your shooting position.
Watch for windows, screens, and direct sun
Windows and screens are common culprits because they create recognizable shapes inside the glasses. Before taking the photo, look at the phone preview and zoom in briefly to inspect the lenses.
If you can already see a bright rectangle in the glasses, take another frame after a small pose adjustment. One version may save you from having to take sun glare out of photo areas or repair a strong lens reflection later.
Simple portrait habits that reduce reflections
Take multiple frames with tiny pose changes. Ask the subject to lower the glasses slightly, turn the face a few degrees, or shift one step sideways. These small changes often produce one image with much cleaner lenses.
It also helps to think about gear and environment. Some people search for a reflection remover lens for phone, but in everyday portrait shooting, angle and light placement usually matter more than accessories.
Two practical examples:
- Indoors near a window: turn the subject 15 to 30 degrees so the window is no longer mirrored directly in the glasses.
- Outdoors in bright sun: move into open shade so you reduce both lens reflections and the need to remove sun glare from photo haze later.
Prevention is not always possible, but it gives you the best chance of keeping eye detail intact. The cleaner the original capture, the easier every later edit becomes.
Final takeaway: improve glare, don’t expect miracles
A realistic editing mindset
The best results come from partial cleanup, careful manual retouching, and realistic expectations. Small hotspots, edge reflections, and mild lens distractions are often fixable enough to improve a portrait noticeably.
Where TouchRetouch fits best
TouchRetouch does not have a one-tap glasses-glare remover, but it can often help you remove glasses glare from photo edits using Remove Objects, Clone Stamp, Blur, and Restore. It works best when the glare is limited and the original eye detail is still partly visible.
Official download options
Get TouchRetouch on the App Store / Google Play.
TouchRetouch is free to download; premium AI features require a paid subscription. Check the App Store or Google Play for current pricing, which varies by region.
Frequently Asked Questions
Can you remove glare from glasses if the eyes are completely covered?
No, not fully. If the original image contains no visible eye detail under the glare, editing can reduce the distraction but cannot reliably recreate the exact missing detail.
What is the best app to remove glare from glasses on iPhone or Android?
The best app depends on the photo. TouchRetouch is a strong mobile option when the glare is small or partial and you want precise manual cleanup with Remove Objects, Clone Stamp, Blur, and Restore on iPhone or Android.
How do I reduce sun flare or bright reflections in a photo on my phone?
Start by lowering the impact of the brightest areas and then clean up leftover artifacts selectively. If the issue is lens flare across the whole frame, exposure and highlight adjustments may help first, while localized reflections can be retouched afterward.
Is TouchRetouch free to use for glare cleanup?
TouchRetouch is free to download; premium AI features require a paid subscription. Check the App Store or Google Play for current pricing, which varies by region.
When should I use Lightroom or an online tool instead of a mobile retouch app?
Use Lightroom when the problem is strongly tied to highlights, masking, or overall exposure balance. Try an online tool when you specifically want browser-based editing, but check privacy, export quality, and realism before uploading portraits.
FAQ
Can you remove glasses glare from a photo on iPhone or Android?
Yes, you can remove glasses glare from a photo on both iPhone and Android using retouch, healing, clone, or AI-based photo editing tools.
What is the best app to remove glare from glasses?
The best app depends on the photo, but apps with healing, clone, and AI object-removal tools usually work best for reducing glare on glasses.
Can AI remove reflection from glasses in a photo?
Yes, AI can help remove reflection from glasses in a photo, especially when the glare is small or does not fully cover important eye details.
How do you remove sun glare or lens flare from a photo?
You can remove sun glare or lens flare by lowering highlights, using retouch tools, and blending nearby areas so the light artifact looks less distracting.
Can Lightroom remove glasses glare from a photo?
Lightroom can reduce mild glasses glare by adjusting highlights, exposure, and masking, but stronger reflections may require a healing or clone tool in another editor.